

Friday, November 27, 2015
Monday, November 23, 2015
Something New to Inspire You
For the past 14 years, Spazuk has perfected a technique called fumage, that allows him to use the flame of a candle or the flame of a torch as a pencil to create his paintings with trails of soot. Using various tools, he intuitively sculpt the plumes of soot left behind in response to the shapes that appear on the canvas.
Wednesday, November 11, 2015


Thursday, November 5, 2015
WEEK 12: COMPOSITION
Home-work for the weeks of November 5 - 12, 2015
Assignments Due: November 12, 2015
Semester Project #2 is due on November 19, 2015

Assignments Due: November 12, 2015
Semester Project #2 is due on November 19, 2015
Remember, if you have any questions about these assignments,
please contact Mrs. Z at mrsz@gmx.com. Don't wait until it's too late!
please contact Mrs. Z at mrsz@gmx.com. Don't wait until it's too late!
INSPIRATION
Read pages 83-88 in Art and the Bible by Francis Schaeffer. Remember to highlight and/or underline your favorite parts or passages that speak to you. We will discuss these pages on November 12th.
VOCABULARY
This week's vocabulary words have been added to our Quizlet. Click here if you still need to join the class: https://quizlet.com/join/tJ49SA5AG. There will be a quiz on these words next week.
SUPPLEMENTAL INFORMATION
- GOLDEN MEAN
Click here for even more detailed information on the "Golden Mean" or "Golden Ratio"
http://arthistory.about.com/cs/glossaries/g/g_golden_ratio.htm - COLORED PENCILS COMPARISON CHART
If you're interested in purchasing some higher quality colored pencils, please click this link. On this page, Matt Fussell offers invaluable advice about selecting colored pencils as well as a comparison chart.http://thevirtualinstructor.com/blog/colored-pencil-comparison-chart
PRINCIPLE OF DESIGN - COMPOSITION
(Tip: Start this video at the 2 minute mark)
** Remember: Drawing is 50% observation *** (Tip: Start this video at the 2 minute mark)
MORE INFORMATION ABOUT GEORGES SEURAT
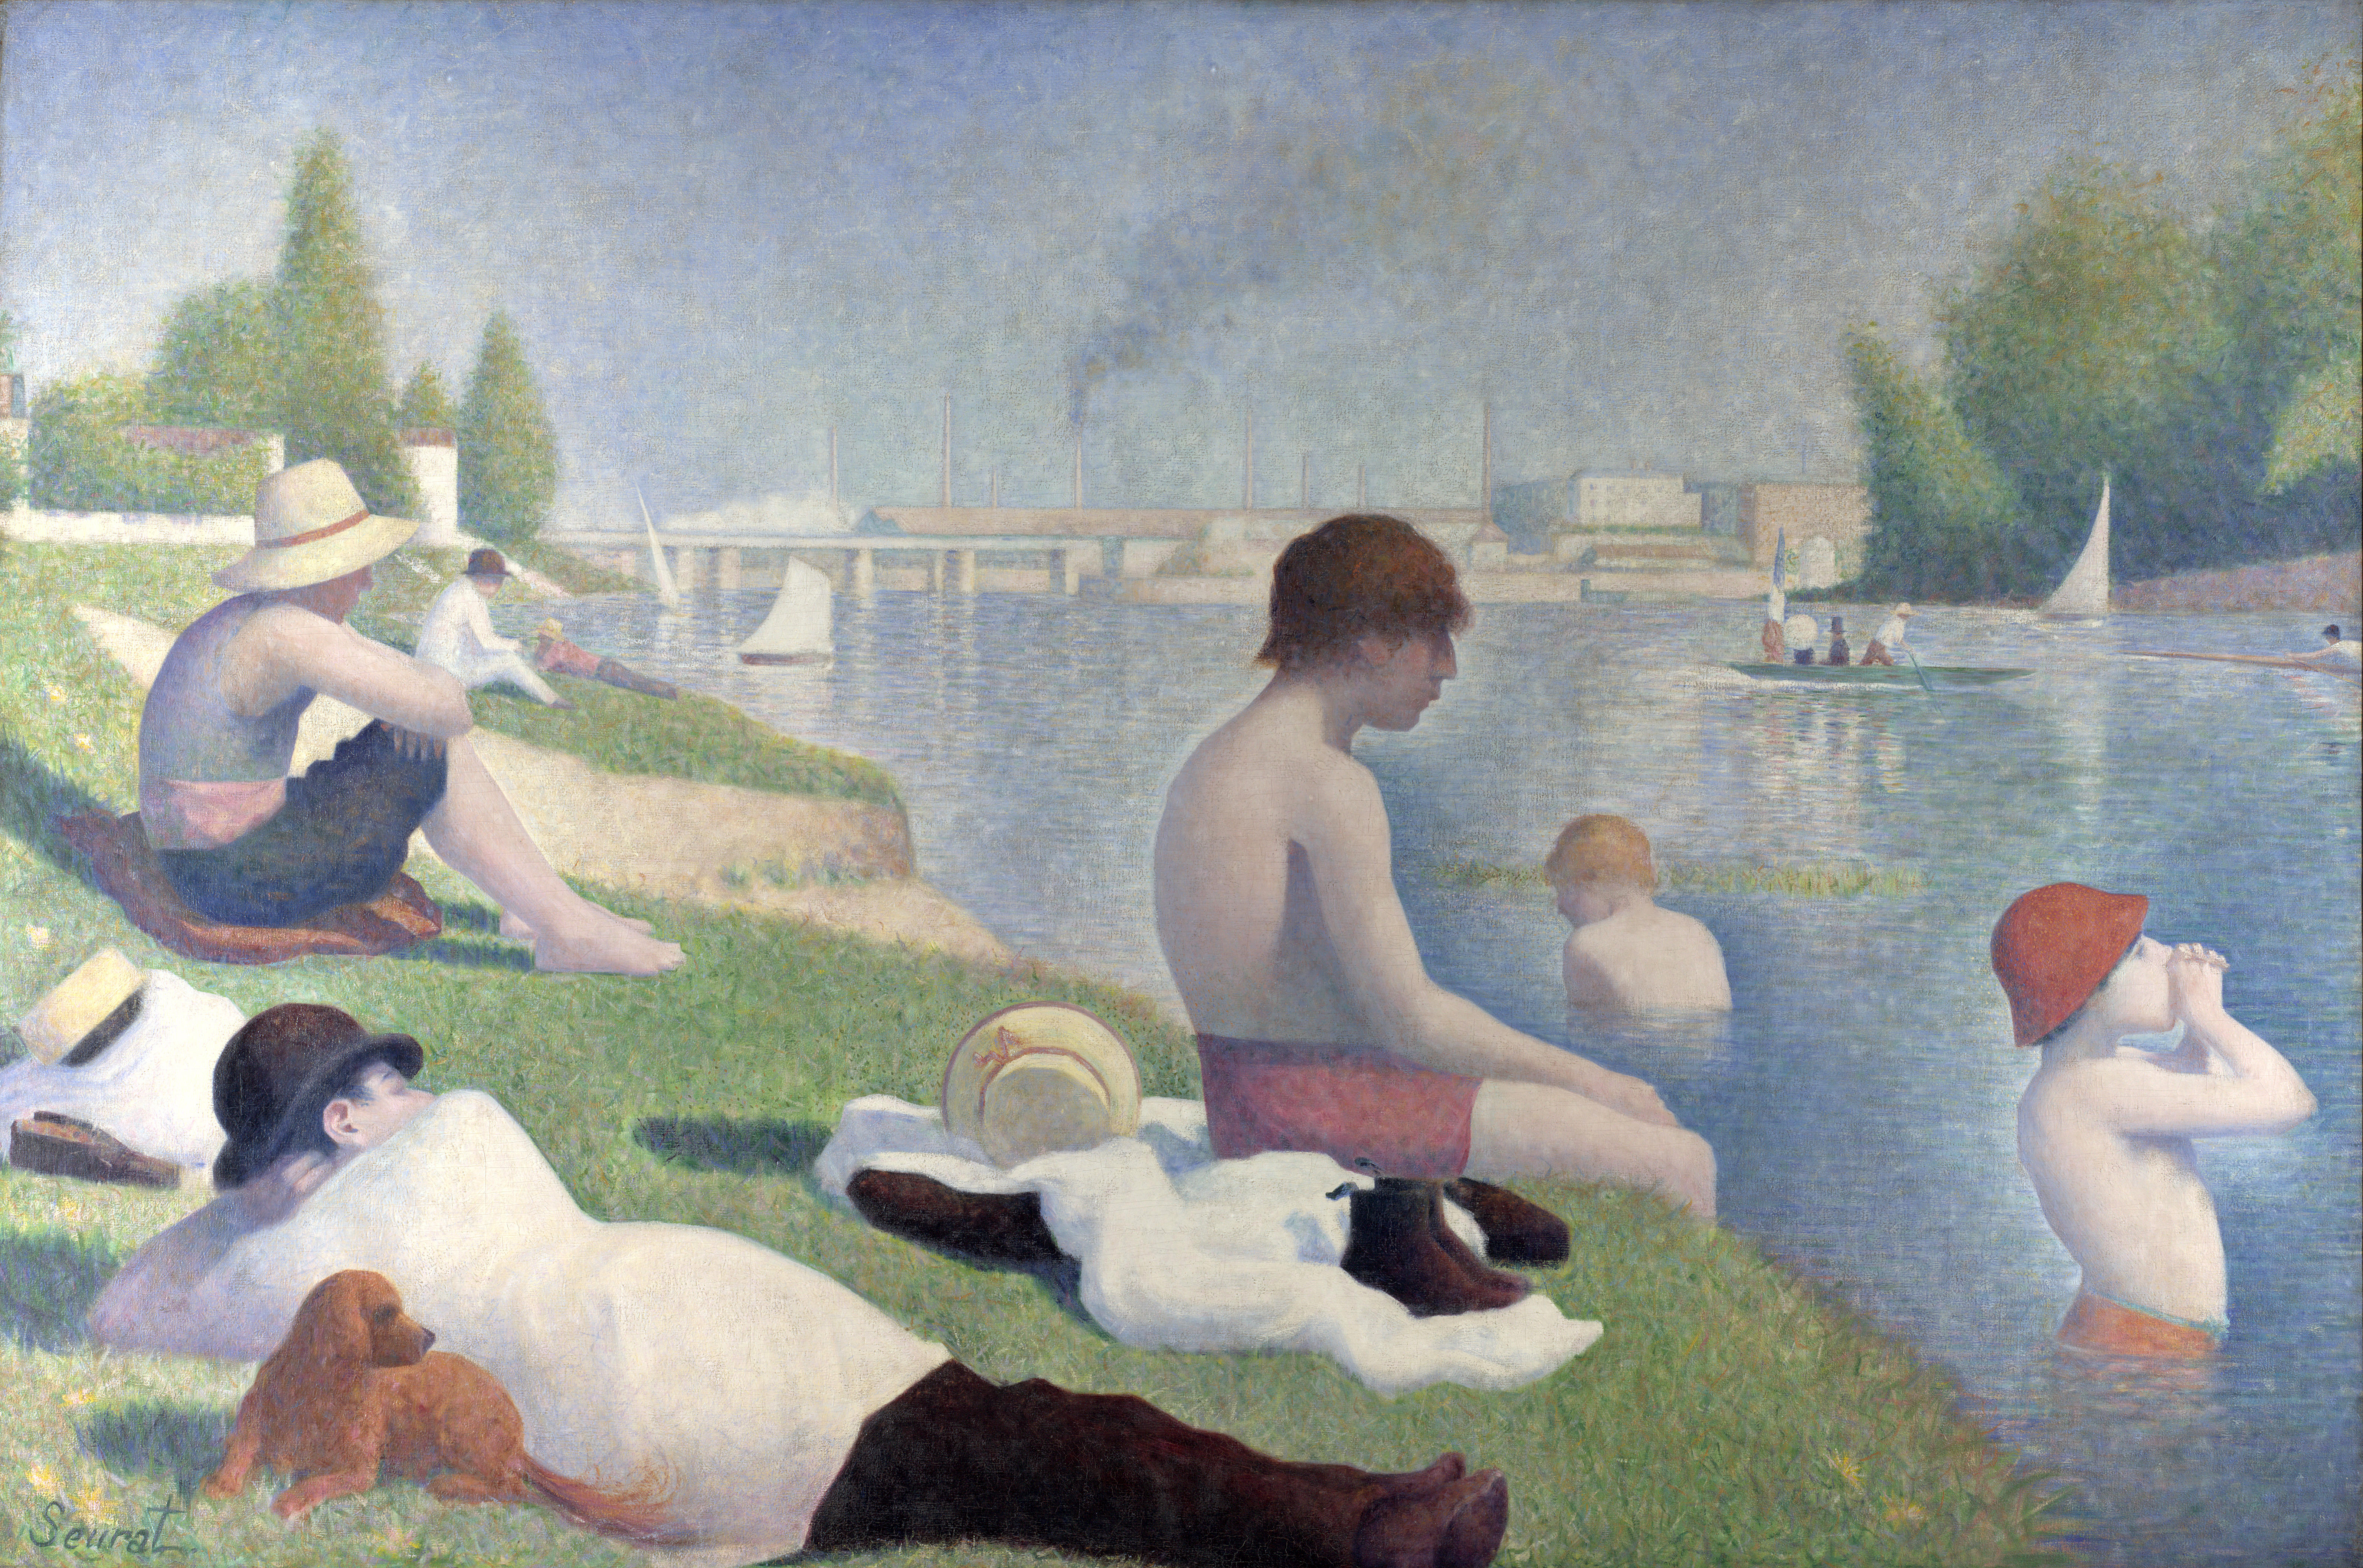 |
| "Bathers at Asnières" by Georges Seruat (click to enlarge) |
PRACTICE DRAWING:
Pay close attention to your COMPOSITION this week. Remember to utilize the elements you've learned (i.e., space, line quality, texture, shape, form, value, and color) as well as the principles of art you've learned so far: contrast, unity, balance, and rhythm. You should spend around 30-45 minutes on each drawing.
DAYS ONE & TWO: Draw an indoor area or an outdoor scene that shows distance using foreground, middle ground, and background. Be sure to include a wide range of values. BEFORE YOU START: Make at least one thumbnail sketch first to experiment with composition and plan your drawing.
DAY THREE: Watch the Seurat video if you haven't watched it yet. As stated, Seurat made many preliminary studies (sketches and drawings) before composing his paintings. Today, draw an outdoor scene and insert a variety of things you've seen in order to make an original work of art. Feel free to include some unusual or unexpected objects, contrasts, textures, etc. for an element of surprise in your drawing. Compose the objects in your picture using what you know about depth (overlapping, larger images in the foreground, smaller images as you move back in the drawing, etc.). Be sure to bring this drawing to class so we can discuss it.
DAY FOUR: Continue working on your drawing which will accompany your final semester project which is due on November 19th. This drawing will be displayed on Presentation Night.
Monday, November 2, 2015

Friday, October 30, 2015
Week 11: COLOR THEORY
Home-work for the weeks of October 29 - November 5, 2015
Assignments Due: November 5, 2015
SEMESTER PROJECT #2: Choose your product/business
Start gathering ads, packaging, and/or photos for your project.
Assignments Due: November 5, 2015
SEMESTER PROJECT #2: Choose your product/business
Start gathering ads, packaging, and/or photos for your project.
Remember, if you have any questions about these assignments,
please contact Mrs. Z at mrsz@gmx.com. Don't wait until it's too late!
please contact Mrs. Z at mrsz@gmx.com. Don't wait until it's too late!
INSPIRATION
Please catch up on your reading through page 83 in Art and the Bible by Francis Schaeffer. Remember to highlight and/or underline your favorite parts or passages that speak to you. We will be discussing pages 49-83 on November 5th. That's a lot of pages we'll be covering, so if there's something that really stuck out to you, be sure to mark it clearly so that we don't skip by it. You might even want to put a bookmark on that page or a post-it.
VOCABULARY
This week's vocabulary words have been added to our Quizlet. Click here if you still need to join the class: https://quizlet.com/join/tJ49SA5AG. There will be a quiz on these words next week.
ELEMENT OF ART - COLOR
** Remember: Drawing is 50% observation ***
MORE INFORMATION ABOUT CLAUDE MONET
 |
| Windmill at Zaandam by Claude Monet (click to enlarge) |
PRACTICE DRAWING:
Pay close attention to the use of the elements you've learned so far: space, line quality, texture, shape, form, value, and color. Also, remember to apply the principles of art you've learned so far: contrast, unity, balance, and rhythm. You should spend around 30-45 minutes on each drawing.
DAY ONE: This exercise is to challenge yourself to think outside the box.Using ONE line only, draw a scene—it can be anywhere (e.g., outdoors, in your bedroom, in your living room, etc.). Begin the line in the foreground and work your way into the background. This line will be very long and take on many characteristics. Do not limit yourself with extra rules. The line may cross and crisscross, wiggle, jiggle, or fly back and forth across the page as you observe what is in front of you.
DAY TWO: Search outdoors for a scene where objects overlap. Use charcoal to draw the scene. As you redraw lines, you can wipe out the charcoal lines with a soft chamois cloth (about 5x5 in.) rather than use a kneaded eraser. It will pick up some of the charcoal, but not all of it, so that you can still see the lines—only lighter. Draw back over the lines until your drawing is as you want it. You will notice that as you wipe out more lines, a soft layer of charcoal builds up. These areas can be quite attractive. Many artists draw and redraw when using charcoal just to create the gray tone.
DAY TWO: Search outdoors for a scene where objects overlap. Use charcoal to draw the scene. As you redraw lines, you can wipe out the charcoal lines with a soft chamois cloth (about 5x5 in.) rather than use a kneaded eraser. It will pick up some of the charcoal, but not all of it, so that you can still see the lines—only lighter. Draw back over the lines until your drawing is as you want it. You will notice that as you wipe out more lines, a soft layer of charcoal builds up. These areas can be quite attractive. Many artists draw and redraw when using charcoal just to create the gray tone.
DAY THREE: Before starting this assignment, please make sure you (1) watch the video below paying attention to how to create a neutral background with your charcoal, (2) read the "Technique Instructions," and (3) follow these instructions:
VIDEO:
- Cover the paper with your charcoal (vine).Try to keep it light enough to be a midtone—neither tint nor shade. Use the chamois (shammy) that came with your supplies to smooth out the surface to create a neutral background.
- Draw an image onto the neutral background with either your woodless graphite pencils or your vine charcoal.
- Using your kneaded eraser, lift off the charcoal to make highlights in your drawing. You can mold your eraser into whatever shape best suits your purpose.
- After you've finished your drawing, fix the finished work by applying a light mist of hairspray.
DAY FOUR: Please use this day to finish up any drawings from this week and/or work on your semester project.
Design Matters
Please read this brief article:
http://www.relevantmagazine.com/culture/design-should-matter-more-christians
It's why we're doing what we're doing in the Foundations in Art class.
It's why we're doing what we're doing in the Foundations in Art class.

Thursday, October 29, 2015

Sunday, October 25, 2015
Happy International Artist Day!
October 25 is INTERNATIONAL ARTIST DAY!!!
Get out there and compose, paint, act, film, dance, sing, conduct, brood.

Friday, October 23, 2015
Principles of Art - Photo
I took this photo tonight at my husband's workplace. Please click it to enlarge it, and comment what you think (or bring your comments to class on Thursday). What PRINCIPLES of design do you see in this photo? What ELEMENTS of art do you notice?


Wednesday, October 21, 2015
Week 10: Rhythm
Home-work for the weeks of October 22-29, 2015
Assignments Due: October 29, 2015
SEMESTER PROJECT #2: Choose your product/business
Start gathering ads, packaging, and/or photos for your project.
Assignments Due: October 29, 2015
SEMESTER PROJECT #2: Choose your product/business
Start gathering ads, packaging, and/or photos for your project.
Remember, if you have any questions about these assignments,
please contact Mrs. Z at mrsz@gmx.com. Don't wait until it's too late!
INSPIRATION
Please catch up on your reading through page 76 in Art and the Bible by Francis Schaeffer. Remember to highlight and/or underline your favorite parts or passages that speak to you. We will be discussing pages 49-76 on October 29th. That's a lot of pages we'll be covering, so if there's something that really stuck out to you, be sure to mark it clearly so that we don't skip by it.
VOCABULARY
This week's vocabulary words have been added to our Quizlet. Click here if you still need to join the class: https://quizlet.com/join/tJ49SA5AG. There will be a quiz on these words next week.
IMPORTANT INFORMATION ABOUT "RHYTHM" IN ART
Please take a few minutes to read through this excellent tutorial which explains the difference between Repetition, Pattern, and Rhythm:
This is another (much shorter) article which defines and shows examples of the 3 Types of Rhythm in art:
PRINCIPLE OF ART - RHYTHM
USING A VIEWFINDER
** Remember: Drawing is 50% observation ***
REVIEW OF SOME OF THE PRINCIPLES OF ART (INCLUDING RHYTHM)
USING A VIEWFINDER
PRACTICE DRAWING:
Pay close attention to the use of RHYTHM in each of your drawings this week, but do not neglect the other elements you've learned so far: space, line quality, texture, shape, form, value, contrast, unity, and balance. You should spend around 30-45 minutes on each drawing.
DAYS ONE & TWO: Make a viewfinder by cutting a hole out of an index card in the same shape and proportions as your composition (what you will be drawing). If you want, you can create a reference point marker by stringing dental floss through the halfway points of the viewfinder (vertically and horizontally). Additionally, for stability and consistency, you can create a "mount" for your viewfinder by turning a styrofoam or paper cup upside down, making a shallow slit across the diameter of the bottom of the cup, and then sliding your viewfinder into the slit. (For detailed instructions, click here, then scroll down to "Part A: How to Make Your Own Viewfinder.")
Once you've got your viewfinder made, setup a "still life" display with two light sources. Be sure to place at least two interesting objects that have smooth surfaces into your composition, and use your viewfinder to frame-out what you'll be drawing.
Start your drawing by sketching in the contour lines with your vine charcoal. Use your finger (or a blending stump or a shammie) to smooth out the value. Then, use a charcoal pencil to add in the shadows and more detail. Use the kneaded eraser* as necessary to lift off charcoal for highlights and lighter values.
* If you haven't done this yet, you will need to "knead" your eraser before using it: "This is done by pulling, then folding, pulling, then folding until it becomes soft and flexible. It can then be shaped to a point or to a wide, flat shape as needed. The eraser is often used as a mark maker. It can be used to make light marks in a dark area."( Brenda Ellis, Artistic Pursuits: The Elements of Art and Composition, Book One)
DAY THREE: Stand near a sidewalk or deserted path. Draw a picture focusing on the rhythms that you see. Be safe. Never sit in a road or bike path where a motorist or cyclist could hit you!
DAY FOUR: Take a walk in the neighborhood or an area approved by your parents. Notice patterns or repeated elements that create rhythms. Draw a scene in which you see rhythm. Here are some examples: train tracks, vehicles on highway, a huge brick wall, fences, stone columns, a row of sheds, rows of trees, posts, bridges.
Thursday, October 15, 2015
Week 9: Balance
Home-work for the weeks of October 8 - 15, 2015
Assignments Due: October 15, 2015
Assignments Due: October 15, 2015
Remember, if you have any questions about these assignments,
please contact Mrs. Z at mrsz@gmx.com. Don't wait until it's too late!
INSPIRATION
Please catch up on your reading in Art and the Bible by Francis Schaeffer. You should be up to page 71 by class time on October 22nd. Since this is almost the end of the second essay, we will wait until the reading assignments are completed and discuss it as a whole on October 29th. Remember to highlight and/or underline your favorite parts or passages that speak to you.
VOCABULARY
The terms for balance, contrast, and unity will be combined with next week's vocabulary words.
TIPS & TECHNIQUES
It takes practice to select the right value when looking at something in color. Sometimes it helps to convert the image to "grayscale" in order to show the values more clearly.
** Remember: Drawing is 50% observation ***
PRINCIPLE OF ART - BALANCE:
PRACTICE DRAWING:
Pay close attention to the use of BALANCE in each of your drawings this week, but do not neglect the other elements you've learned so far: space, line quality, texture, shape, form, value, space, contrast and unity. You should spend around 30-45 minutes on each drawing.
DAY ONE: Using pencil and paper redraw and rearrange the objects in this week's painting in a new way. What other ways could the figures, doorway, windows, and elements within the painting balance?
DAY TWO: Arrange a group of three or more objects near an open window using daylight as a light source. Balance light and dark areas. Draw the arrangement.
DAY TWO: Arrange a group of three or more objects near an open window using daylight as a light source. Balance light and dark areas. Draw the arrangement.
DAY THREE: Make a light box as instructed. Arrange objects within it. Arrange the light. Draw the objects. Works from a light box will show sharp contrasts in values.
DAY FOUR: Choose a group of objects to arrange within the light box. Try different arrangements and different angles of lighting until you have a view that balances. Consider shading and shadows as part of the drawing. Draw a picture showing balance.
Thursday, October 8, 2015
My Friend, The Artist
Since we took a look at one of my friend's paintings in class today, as well as the picture that inspired it, I thought you might enjoy viewing some of her other works. Here is a link to her website.

Art: Week 8
Home-work for the weeks of October 8 - 15, 2015
Assignments Due: October 15, 2015
Assignments Due: October 15, 2015
Remember, if you have any questions about these assignments,
please contact Mrs. Z at mrsz@gmx.com. Don't wait until it's too late!
INSPIRATION
Please catch up on your reading in Art and the Bible by Francis Schaeffer. You should be up to page 61 by class time on October 15th. We will not have time to discuss this on the 15th, so please just stay on track with your reading. We will take some extra time on October 22nd to discuss all the pages we've been reading over the past couple of weeks
VOCABULARY
There is no new vocabulary this week. Feel free to review the flashcards in Quizlet, so you remember what you've already learned this semester.
TIPS & TECHNIQUES
It takes practice to select the right value when looking at something in color. Sometimes it helps to convert the image to "grayscale" in order to show the values more clearly.
** Remember: Drawing is 50% observation ***
SUPPLEMENTAL VIDEOS FOR WEEK 8:
ELEMENT OF ART - SPACE:
ELEMENT OF ART - SPACE:
PRINCIPLE OF ART - CONTRAST:
UNITY:
PRACTICE DRAWING
Pay close attention to the use of space, contrast and unity in each of your drawings this week, but do not neglect the other elements you've learned so far: space, line quality, texture, shape, form, and value. You should spend around 30-45 minutes on each drawing.
DAY ONE: Use a half-sheet of paper. Draw random, intersecting lines over the paper. Fill one shape from one of its edges to the other in degrees from dark to light. In the shape next to the dark area, draw from light to dark, so that the light area sits beside the dark area. Continue to fill in shapes until all are filled. You can do this with graphite or colored pencils. Just make sure you follow the instructions.
DAY TWO: Place a light-colored object in front of a window. Notice if the object is darker than the view behind it. Draw the contrast. Remember contrast multiple elements of art (space, line quality, texture, shape, form, and value), not just the values.
DAY TWO: Place a light-colored object in front of a window. Notice if the object is darker than the view behind it. Draw the contrast. Remember contrast multiple elements of art (space, line quality, texture, shape, form, and value), not just the values.
DAY THREE: Choose one element of art such as line, shape, or value to show both contrast and unity within the same picture. *** Make sure you watch the "Principle of Design: Unity" video above BEFORE you do this assignment. *** Draw from life, observing the subject directly as you draw.
DAY FOUR: Look for contrast in a landscape scene. You may want to view the scene at different times of the day. Looking east at dusk is a good time to look for lighter objects against a darkening sky. Draw a scene. This could be a "zoomed in" scene such as the ladybug on the leaf, or a "zoomed out" scene such as a landscape or view from the bleachers at a ballpark. Be creative and have fun!
Wednesday, October 7, 2015
Wednesday, September 30, 2015

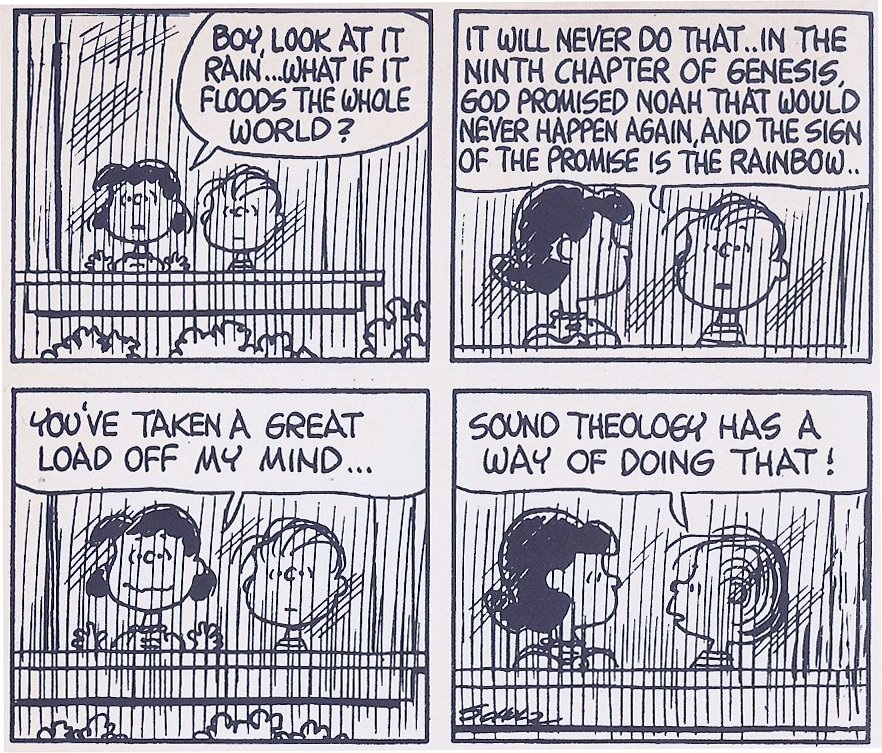
Elements of Art in Cartoons
How many of the elements of art can you find in this cartoon? How many techniques?

Sunday, September 27, 2015

Thursday, September 24, 2015
Semester Project #1 Reminder & Guidelines
This can be a short paper OR a brief oral presentation (use of
PowerPoint is encouraged)
Choose a work
of art—a painting or a drawing—to analyze from the period of history you are
currently studying at home. The piece should relate to a significant event,
idea, or movement of that time. Try to pick something you haven’t previously
studied.
Things to include:
- a brief introduction to the time period or event you are studying (what was going on at the time of the EVENT DEPICTED in the painting?)
- the artist (who painted it? where was s/he born? when? where did this person learn how to paint?)
- a description of the art work itself (when was it painted? with what material? on what type of media?
- an analysis of how the artist used various elements of art its design (so far, you've studied space, line, texture, shape, form, and value). How did the artist use these elements in the painting? (you don't have to explain how every single element was used or not used)
- an explanation of how this particular piece has influenced historical perspective about your subject.
Your focus should be on analysis and
explanation.
Project is due: October 8, 2015
Students will either
read their papers aloud (visual aids are encouraged) OR give their oral
presentations to the class. Presentations will be videotaped (optional) and
made available to the student within a week.
_-_Washington_Crossing_the_Delaware_-_Google_Art_Project.jpg)
For example: the painting of George Washington crossing the Delaware. This painting romanticized the crossing which actually took place in the middle of the night...The focus is on the military strength of Washington and his determination. When people see this, they will imagine...
ART: WEEK 6
Home-work for the weeks of September 24 - October 8, 2015
Assignments Due: October 8, 2015
Assignments Due: October 8, 2015
WEEK ONE (September 24-October 1, 2015):
Work on homework assignments (see below)
WEEK TWO (October 1-8):
Work on Semester Project #1
Remember, if you have any questions about these assignments,
please contact Mrs. Z at mrsz@gmx.com. Don't wait until it's too late!
INSPIRATION
Read pages 49-57 in Art and the Bible by Francis Schaeffer. Be sure to highlight or copy down any quotes that resonate (click) with you, and be ready to share your insights in class.
VOCABULARY
The vocabulary lists are now on Quizlet. With your parents' permission, click here to add yourself to the class and use the flashcards to learn this week's terms.
Click here to join the class: https://quizlet.com/join/tJ49SA5AG
You will have a quiz on these terms/concepts next week. You should be able to match words to their definitions and how to identify each concept in a drawing.
This week's art focuses on the illusion of value:

TIPS & TECHNIQUES
It takes practice to select the right value when looking at something in color. Sometimes it helps to convert the image to "grayscale" in order to show the values more clearly.
** Remember: Drawing is 50% observation ***
SUPPLEMENTAL VIDEO FOR WEEK 6:
Are you choosing to draw objects you think are interesting?
PRACTICE DRAWING
Pay close attention to the use of value in each of your drawings this week, but do not neglect the other elements you've learned so far: space, line quality, texture, shape, and form. You should spend around 30-45 minutes on each drawing.
DAY ONE: Draw an egg based on the instructions in the video we watched in class and using the photo handout as your reference. Remember to shoot for a full-range of value in your drawing. Develop the background by using cross-contour lines that contrast with the egg. Don't be afraid to take chances and embellish your composition by trying new things!
DAY TWO: Complete two Value Shading Worksheets — one with graphite, and the other with a colored pencil(s) of your choice (use only one color per object).
DAY TWO: Complete two Value Shading Worksheets — one with graphite, and the other with a colored pencil(s) of your choice (use only one color per object).
DAY THREE: Draw an interesting object. Be sure to show the full value scale in the highlights and shadows of your composition. Pay attention to the local values of your object and its surroundings. Remember: Local values are flat areas, each area with its own value. (Example: light hitting chalkboard and wall at the same time.)
DAY FOUR: Draw an interesting object that is receiving one direct source of light. If you choose to draw outside, do it in either the morning or afternoon. Noon is not a good time to draw outdoors due to the sun's brightness which could cause the values to wash out. Look for light and dark values and show them in your drawing. If you want to, try to imitate the extreme contrasts you would find in the Chiaroscuro technique we studied in class.
Wednesday, September 23, 2015
Why Am I Teaching an Art Class?
Have you ever wondered why I decided to teach an art class this semester? I prayed about what to teach, and God put it on my heart. I could not shake it. I was asked to pray about teaching Spanish (which I have taught before), and no matter how I prayed, I could not shake the feeling that I was supposed to teach this art class. God has gifted each one of us for His service. For example, some are teachers, some are engineers, some are artists, and some are engineering teachers who paint on the side! :) Our purpose is to respond to the call of God on our lives and do what we were created to do.
Why Christians should Paint, Dance, Quilt, Act, Compose Music, Write Stories, Decorate Cookies, and participate in the Arts
"Whatever you do, do all to the glory of God."
1 Corinthians 10:31b
1 Corinthians 10:31b
Why Christians should Paint, Dance, Quilt, Act, Compose Music, Write Stories, Decorate Cookies, and participate in the Arts
Thursday, September 17, 2015
ART: WEEK 5
Home-work for the week of September 17-23, 2015
Assignments Due: September 24, 2015
Remember, if you have any questions about these assignments,
please contact Mrs. Z at mrsz@gmx.com. Don't wait until it's too late!
Assignments Due: September 24, 2015
Remember, if you have any questions about these assignments,
please contact Mrs. Z at mrsz@gmx.com. Don't wait until it's too late!
PROJECT #1: ART AS HISTORY - PROJECT TOPIC DUE!!!
You need to let Mrs. Z know what piece of art your first project will be covering.
You need to let Mrs. Z know what piece of art your first project will be covering.
Please email it to her asap. Thanks!
INSPIRATION
Read pages 40-48 in Art and the Bible by Francis Schaeffer. Be sure to highlight or copy down any quotes that resonate (click) with you, and be ready to share your insights in class.
VOCABULARY
The vocabulary lists are now on Quizlet. With your parents' permission, click here to add yourself to the class and use the flashcards to learn this week's terms.
Click here to join the class: https://quizlet.com/join/tJ49SA5AG
You will have a quiz on these terms/concepts next week. You should be able to match words to their definitions and how to identify each concept in a drawing.
This week's art focuses on the illusion of form:
.jpg) |
| "The Creation of Adam" by Michalangelo. Fresco. c. 1512 Here is a close-up of the hands: 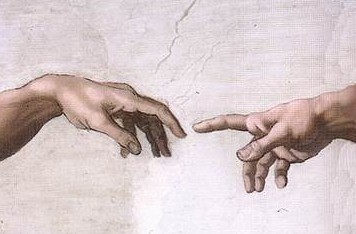 |
TIPS & TECHNIQUES
"The most important part of the still life are the
subjects you choose to put in it. Choose subjects with interesting shapes
and/or textures. Choose something familiar." Brenda Ellis
** Remember: Drawing is 50% observation ***
** Remember: Drawing is 50% observation ***
Here's a great example of variations in lighting and how it affects the shadows on an object. Pay close attention to your light source when you're drawing. Experiment with either moving your light source, your object, or your own position (perspective). Find the right shading for your drawing, and then go for it!
 |
| Click to enlarge. The STAR indicates the position of the light source. |
RECOMMENDED VIDEOS FOR WEEK 5:
>>> Click here to watch one of the videos on the element of FORM. Feel free to pause and rewind the video as necessary in order to complete the listening guide. <<<
Supplemental Video (make sure you've watched the video above FIRST):
>>> Click here to watch one of the videos on the element of FORM. Feel free to pause and rewind the video as necessary in order to complete the listening guide. <<<
Supplemental Video (make sure you've watched the video above FIRST):
Are you choosing to draw objects you think are interesting?
PRACTICE DRAWING
Pay close attention to the use of form in each of your drawings this week, but do not neglect the other elements you've learned so far: space, line quality, texture, and shape. You should spend around 30-45 minutes on each drawing.
DAY ONE: Draw a cube and label highlight, midtone, core shadow, and cast shadow. Draw a pyramid. Draw a sphere and label highlight, midtone, core shadow, cast shadow, and reflected highlight. Draw an organic form—this can be any non-flat shape. Pay attention to value and shading. Feel free to use different pencils to achieve lighter and darker values.
DAY TWO: Take a "mini field trip." Walk around the block or down the street with your drawing materials. Walk slowly & take time to observe things like an artist. Look for things to draw that have good visual qualities: interesting shapes, textures, or lines. Draw them. You can draw several objects on the same page. They do not have to be related. Fill the page with whatever you observe.
DAY TWO: Take a "mini field trip." Walk around the block or down the street with your drawing materials. Walk slowly & take time to observe things like an artist. Look for things to draw that have good visual qualities: interesting shapes, textures, or lines. Draw them. You can draw several objects on the same page. They do not have to be related. Fill the page with whatever you observe.
DAY THREE: Choose a simple form to study. Using a lamp as your light source, set up different lighting situations until you find the one you want to draw. It may necessary to block extra light (from a window or ceiling light) so that only the light source is shining on the object. Draw your observations.
DAY FOUR: Draw a group of still life objects following the instructions for choosing subjects (on your Vocabulary List), lighting, and background. Use line to describe form. Remember: When drawing multiple objects, select items that vary in size, shape, and texture. It also helps if you slightly overlap them. Whatever you do, make sure YOU like it! Your goal this semester is to develop your own style of drawing.
Friday, September 11, 2015
Shape (Review)
Here's a link to the brief introductory video we watched about Shape (posted for our class member who was absent yesterday): INTRODUCTION TO SHAPE
Thursday, September 10, 2015
ART: WEEK 4
Home-work for the week of September 10-17, 2015
Assignments Due: September 17, 2015
Remember, if you have any questions about these assignments,
please contact Mrs. Z at mrsz@gmx.com. Don't wait until it's too late!
Assignments Due: September 17, 2015
Remember, if you have any questions about these assignments,
please contact Mrs. Z at mrsz@gmx.com. Don't wait until it's too late!
PROJECT #1: ART AS HISTORY - PROJECT TOPIC DUE!!!
You need to let Mrs. Z know what piece of art your first project will be covering.
You need to let Mrs. Z know what piece of art your first project will be covering.
Please email it to her asap. Thanks!
INSPIRATION
Read pages 32-40 in Art and the Bible by Francis Schaeffer. Be sure to highlight or copy down any quotes that resonate (click) with you, and be ready to share your insights in class.
VOCABULARY
The vocabulary lists are now on Quizlet. With your parents' permission, click here to add yourself to the class and use the flashcards to learn this week's terms.
Click here to join the class: https://quizlet.com/join/tJ49SA5AG
You will have a quiz on these terms/concepts next week. You should be able to match words to their definitions and how to identify each concept in a drawing.
This week's art features organic (biomorphic) shapes.
 |
| "The Study of Two Plants" by Leonardo da Vinci |
TIPS & TECHNIQUES
"An artist can use the mind's ability to focus and see anything they want to see. When one sets his focus on a color or shape,
suddenly the color or shapes of things become very clear."
Brenda Ellis
suddenly the color or shapes of things become very clear."
Brenda Ellis
** Remember: Drawing is 50% observation ***
RECOMMENDED VIDEOS FOR WEEK 4:
Are you taking time to notice a variety of shapes in nature?
Are you looking at nature purposefully? Are you using the sight-measure method for precision?
Are you looking at nature purposefully? Are you using the sight-measure method for precision?
PRACTICE DRAWING
Pay close attention to the use of shape in each of your drawings this week, but do not neglect the other elements you've learned so far: space, line quality, and texture. You should spend around 30-45 minutes on each drawing.
DAY ONE: Draw a hand. Use a hard lead to lightly sketch the hand using only geometric shapes. Once your shape is completed, use a softer lead to draw in your contour lines and texture. Refer to your handout if you need some help seeing the shapes in a hand.
DAY TWO: Draw a page of small objects while observing them. Take time to look carefully at the outside edges. As you look closely, you will see more and more, and your drawings will be more interesting.
DAY THREE: Go outdoors with a pencil and practice measurement on a variety of tree shapes. Use a pencil to measure the object visually using your eyes, not a ruler. Ask measurement questions as you make 5-minute sketches of a few trees.
DAY THREE: Go outdoors with a pencil and practice measurement on a variety of tree shapes. Use a pencil to measure the object visually using your eyes, not a ruler. Ask measurement questions as you make 5-minute sketches of a few trees.
DAY FOUR: Make a drawing using trees as your subject. It can be one tree or a group of trees. If it's a sunny day, try to find a spot in the shade where the sun won't be reflecting off your white drawing paper. Observe the trees directly by sitting near them, but far enough away that the entire shape is in view. Will your drawing fit better on the page if you turn it horizontally? Draw a few simple lines with the 2H pencil to place the objects on the paper. Measure the tree(s) using the sight method. Keep in mind the proportions of both the tree(s) and the surrounding area. Use the HB pencil as you continue to draw. Finally, add dark areas using a softer graphite pencil.
TIP ON DRAWING TREES:
In many types of trees, a branch does not decrease in diameter until it splits off into another direction.
Thursday, September 3, 2015
ART: WEEK 3
Home-work for the week of September 3-10, 2015
Assignments Due: September 10, 2015
Remember, if you have any questions about these assignments,
please contact Mrs. Z at mrsz@gmx.com. Don't wait until it's too late!
Assignments Due: September 10, 2015
Remember, if you have any questions about these assignments,
please contact Mrs. Z at mrsz@gmx.com. Don't wait until it's too late!
INSPIRATION
Read pages 25-32 in Art and the Bible by Francis Schaeffer. Be sure to highlight or copy down any quotes that resonate (click) with you, and be ready to share your insights in class.
VOCABULARY
The vocabulary lists are now on Quizlet. With your parents' permission, click here to add yourself to the class and use the flashcards to learn this week's terms.
Click here to join the class: https://quizlet.com/join/tJ49SA5AG
You will have a quiz on these terms/concepts next week. You don't need to memorize the definitions, but you do need to understand what they mean and know how to identify each concept in a drawing.
This week's art work features a wonderful variety of textures:
 |
|
TIPS & TECHNIQUES
"When drawing or painting texture, it is important to
pay close attention to the values — they reveal the illusion of texture."
Matt Fussell
pay close attention to the values — they reveal the illusion of texture."
Matt Fussell
** Remember: Drawing is 50% observation ***
 |
| This week, observe with your eyes AND your hands! |
Are you taking time to observe with your senses before you draw? While you draw?
Are you looking at and/or touching your object(s) 50% of the time?
Are you looking at your paper the other 50%
Are you using the full spectrum of value in your drawing to show texture?
Are you looking at and/or touching your object(s) 50% of the time?
Are you looking at your paper the other 50%
Are you using the full spectrum of value in your drawing to show texture?
PROJECT #1: ART AS HISTORY - REMINDER!!!
You should already be thinking about an event in history that you would like to study through art. Once you have your event, search for a painting or drawing depicting that event. Be sure to let me know your decision within the next couple of weeks. The sooner you choose your event, the better.
PRACTICE DRAWING
Pay attention to the use of space, line quality, and texture in each of your drawings this week. You should spend around 30-45 minutes on each drawing.
DAY TWO: Find 10 different textures you can physically touch. Touch it! Lie on it! Experience it! After totally experiencing these objects, draw one (or more) of the objects and its textures in a way that describes it, based on your experience with it. Feel free to use patterns to communicate different areas on the same object. Remember to bring this to class with you next week.
DAY THREE: Draw some objects that have interesting texture. Van Gogh seemed to use lines that flowed in the directions of what he was looking at. Every patch of plant life created a different texture. As you look at your objects, draw the surface. Try new ways of making marks.
DAY FOUR: Draw a landscape while looking at it — this is NOT blind contour drawing, but rather drawing it "live and in-person." This kind of direct observation offers a variety of textures for you to work with. Draw the textures you observe, using different kinds of lines and marks. Use the eraser as a tool to create white marks on a dark area.
Friday, August 28, 2015
Naturalism in the Renaissance
Feel free to take a closer look at the masterpiece we examined in class. It is a beautiful example of a painting in the early-Renaissance style of Naturalism. (Click on the photo to enlarge it.)
Here is the other drawing we examined in class. Take time to observe some of the characteristics we discussed in class, and then incorporate what you like into your own drawings. (Click to enlarge.)
Here is the "Mini-Biography of Leonardo da Vinci" we didn't have time to watch in class. Enjoy!
 |
| "The Annunciation" by Leonardo da Vinci and his mentor Andrea Verrocchio |
If you'd like to learn a little more about this painting,
check this out: http://www.wga.hu/html/l/leonardo/01/2annunc.html.
Here is the other drawing we examined in class. Take time to observe some of the characteristics we discussed in class, and then incorporate what you like into your own drawings. (Click to enlarge.)
_-_Google_Art_Project.jpg) |
| "Study for an equestrian monument" by Leonardo da Vinci |
Here is the "Mini-Biography of Leonardo da Vinci" we didn't have time to watch in class. Enjoy!
Thursday, August 27, 2015
ART: WEEK 2
Home-work for the week of August 27 - September 3, 2015
Assignments Due: September 3, 2015
Remember, if you have any questions about these assignments,
please contact Mrs. Z at mrsz@gmx.com. Don't wait until it's too late!
Assignments Due: September 3, 2015
Remember, if you have any questions about these assignments,
please contact Mrs. Z at mrsz@gmx.com. Don't wait until it's too late!
INSPIRATION
Read pages 19-25 in Art and the Bible by Francis Schaeffer. Be sure to highlight or copy down any quotes that resonate (click) with you, and be ready to share your insights in class.
VOCABULARY
The vocabulary lists are now on Quizlet. With your parents' permission, click here to add yourself to the class and use the flashcards to learn this week's terms (and review last week's as well).
Click here to join the class: https://quizlet.com/join/tJ49SA5AG
You will have a quiz on these terms/concepts next week. You don't need to memorize the definitions, but you do need to understand what they mean and know how to identify each concept in a drawing.
TIPS & TECHNIQUES
Videos to watch this week: TBA
PROJECT #1: ART AS HISTORY
You should already be thinking about an event in history that you would like to study through art. Once you have your event, search for a painting or drawing depicting that event. Be sure to let me know your decision within the next couple of weeks. The sooner you choose your event, the better.
PRACTICE DRAWING
Pay attention to the elements of art and space in each of your drawings this week. You should spend at least 30-45 minutes on each drawing.
DAY ONE: Go. Search. Find at least 5 items that interest you. Draw several items. Focus on the line quality (a.k.a. 'line variation') as you draw the edges of each object. Draw not only the outside edges, but also those you see within the outside edge. The more you draw, the more skill you will acquire. Remember to OBSERVE.
DAY TWO: Draw a border 1/2 inches from the edges of the paper and then draw a picture filling the space of the page. The pencil lines at the border will help you become more aware of the whole space. Use da Vinci's method of redrawing lines, while leaving the first lines untouched. Erase incorrectly placed dark lines that become distracting.
DAY THREE: Find a photo of an animal or person. Set up the photo next to your drawing paper (use an artboard if you have one). Draw using hard pencils for light marks and soft pencils for dark marks.
DAY FOUR: Draw a face using a photograph as a reference. Draw lines lightly at first. With the 4H pencil, lightly place the outline on the page (these marks will not be erased). Draw over the lines with the HB pencil making corrections as you go. Change lines as needed to get closer to what you see. Only erase lines that distract. Add details with the 4B pencil. At this point, concentrate on specific areas of the drawing while adding the final touches. ** Remember to draw what you observe. Does your finished drawing include a variety of line qualities (line variation)?
Monday, August 24, 2015
Tutorial for Drawing a Face
One of the assignments this week is to draw a face. At this point in the class, you have not been instructed on technique, so please do not obsess about your drawing. This is just a FUN assignment to practice drawing with active and inactive space. However, if you've got a few minutes, and your interested in some very basic tips on proportions, feel free to watch this video. Remember to do your first lines with a harder lead so they are very light. Once you have your shape, you can use one of the softer leads to draw in the details. *** Don't spend too much time on this assignment. ***
Friday, August 21, 2015
They're Here! They're Here!
The "bonus" art supplies have arrived!!! I will be out of town until late Sunday night, but if you would like to pick yours up prior to class on Thursday, please let me know! You have my contact information in the syllabus & the family directory.


Thursday, August 20, 2015
ART: WEEK 1
Home-work for the week of August 20-26, 2015
Assignments Due: August 27, 2015
Remember, if you have any questions about these assignments,
please contact Mrs. Z at mrsz@gmx.com. Don't wait until it's too late!
Assignments Due: August 27, 2015
Remember, if you have any questions about these assignments,
please contact Mrs. Z at mrsz@gmx.com. Don't wait until it's too late!
Since we were unable to cover this in class as much as I had hoped, please take a few minutes BEFORE you start your homework assignments to PLEASE WATCH THIS VIDEO. This video is also by Matt Fussell (we watched his "Graphite" video in class today). In this video, Mr. Fussell addresses a similar topic with "Positive Space" and "Negative Space." Be sure to apply this knowledge when you do your drawings this week.
INSPIRATION
Read pages 13-19 in Art and the Bible by Francis Schaeffer. Be sure to highlight or copy down any quotes that resonate with you, and be ready to share your insights in class.
VOCABULARY
(We don't have much vocabulary this week...enjoy!)
- Active Space
- Inactive Space
- Graphite Scale
TIPS & TECHNIQUES
Videos to watch this week:
"How to Hold & Control Your Pencil" (8 minutes)
"How To Draw with Justin BUA - Pencils: Sharpening" (12 minutes)
* UNDER A PARENT'S SUPERVISION, feel free to sharpen a pencil like this. Don't start with one of your art pencils. Start with a regular pencil until you get the hang of it. Then sharpen one of your graphite pencils to a point leaving up to 3/4" exposed. The sandpaper pointer was delayed in shipping, but I will have them for you next week. If you wish, you could use a regular piece of sandpaper in the meantime.
"How To Critique" (7 minutes)
* We will be talking more about art criticism as we go through the semester, and we will spend a few minutes each week critiquing our work. This is a brief introduction to get us started in the process. :)
PRACTICE DRAWING
Pay attention to the elements of art and space in each of your drawings this week. You should spend at least 30 minutes on each drawing.
DAY ONE: Assuming the weather is cooperative, head outside and draw a scene. Seek out a scene with active and inactive spaces. Clearly incorporate both types of space in your drawing.
DAY TWO: Draw a face from a photograph, or look at your face in a mirror and draw what you see.
DAY THREE: Setup a group of simple objects and draw them paying close attention to how they fill the space of the page. Think about this BEFORE you begin drawing. For example, if the group of objects is tall, turn your paper vertically. Be sure to fill the page with your drawing, but make sure you leave inactive (or less active) spaces around active spaces to balance your drawing. * Use a mid-range pencil such as HB or 2H.
DAY FOUR: Read the following passage from "St. George and the Dragon." Then imagine one of the scenes described in the passage and draw it. Feel free to do some research on dragons or dragon-like creatures in order to get an idea how to draw the dragon. Or use your imagination. It's your drawing! such as lizards, snakes, or artist's drawings of dinosaurs in nature, magazines, story books, non-fiction books, encyclopedias, science text books, etc.
~ ~ ~ ~ ~ ~ ~ ~ ~ ~ ~ ~
Excerpt
from
“St. George and the Dragon”
Retold by J. Berg Esenwein and Marietta Stockard
“St. George and the Dragon”
Retold by J. Berg Esenwein and Marietta Stockard
“Lead the way, brave
Princess. Show me where this monster may be found.”
When
the Princess saw St. George’s flashing eyes and great, strong arm as he drew
forth his sword, she felt afraid no more. Turning, she led the way to a shining
pool.
“There’s
where he stays,” she whispered. “See, the water moves. He is waking.”
St.
George saw the head of the dragon lifted from the pool. Fold on fold he rose
from the water. When he saw St. George he gave a roar of rage and plunged
toward him. The smoke and flames flew from his nostrils, and he opened his
great jaws as if to swallow both the knight and his horse.
St.
George shouted, and waving his sword above his head, rode at the dragon. Quick
and hard came the blows from St. George’s sword. It was a terrible battle.
At
last the dragon was wounded. He roared with pain and plunged at St. George,
opening his great mouth close to the brave knight’s head.
St.
George looked carefully, then struck with all his strength straight down
through the dragon’s throat, and he fell at the horse’s feet—dead.
~ ~ ~ ~ ~ ~ ~ ~ ~ ~
And just so you've got it... here's the work of art we examined in class this week:
 |
| Young Knight in a Landscape by Vittore Carpaccio |
Here's the Wikipedia article about this piece, if you're interested. ;)
